Training guide · Platform administrator
Platform administrator
The few people who run steepl itself. Create stakes and wards, make the first grants so each unit can run itself, archive or delete wards, and watch the background jobs. Platform administrators never see the bishopric area.
UAT test account: platform@steepl.test — password from your UAT coordinator.
On this page
What you can do
- Create stakes and wards (private until approved)
- Grant the first stake president or bishop
- Archive, unarchive or permanently delete a ward
- Check System health: calendar feeds and Cron runs
- Add or remove other platform administrators
Before you start
- Sign in; a platform administrator lands on Platform (also in the Account menu). The menu is Overview · Stakes · Wards · Admins.
- UAT testers: use Sign in with email with the platform test account and the password from your UAT coordinator.
- Approval is not yours to give: the bishop approves a ward site in the ward's Settings, and the stake president approves the stake page in the stake Settings.
Task 1: Check system health
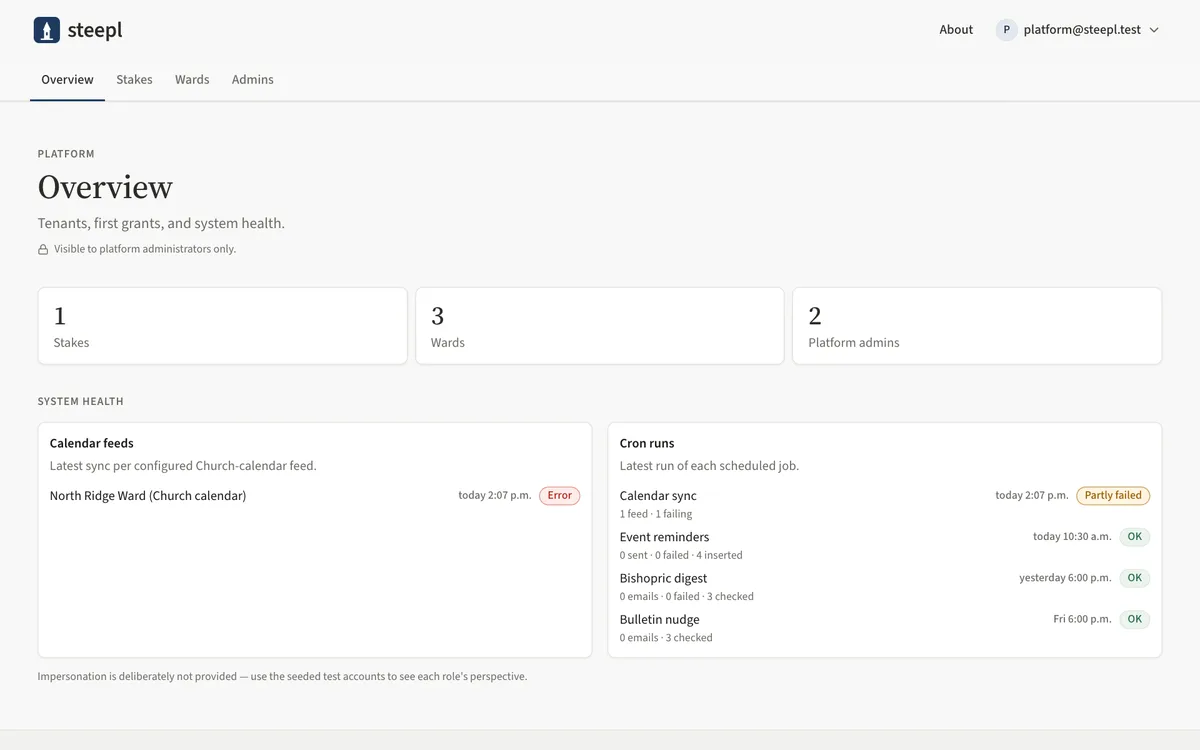
- Open Overview: counts of Stakes, Wards and Platform admins.
- Under System health, Calendar feeds shows the latest sync of each Church-calendar feed (OK, HTTP status or Error).
- Cron runs shows the latest run of each scheduled job — Event reminders, Calendar sync, Bulletin nudge, Broadcast, Bishopric digest — marked OK, Partly failed, Failed or Running.
Task 2: Create a stake and grant its president
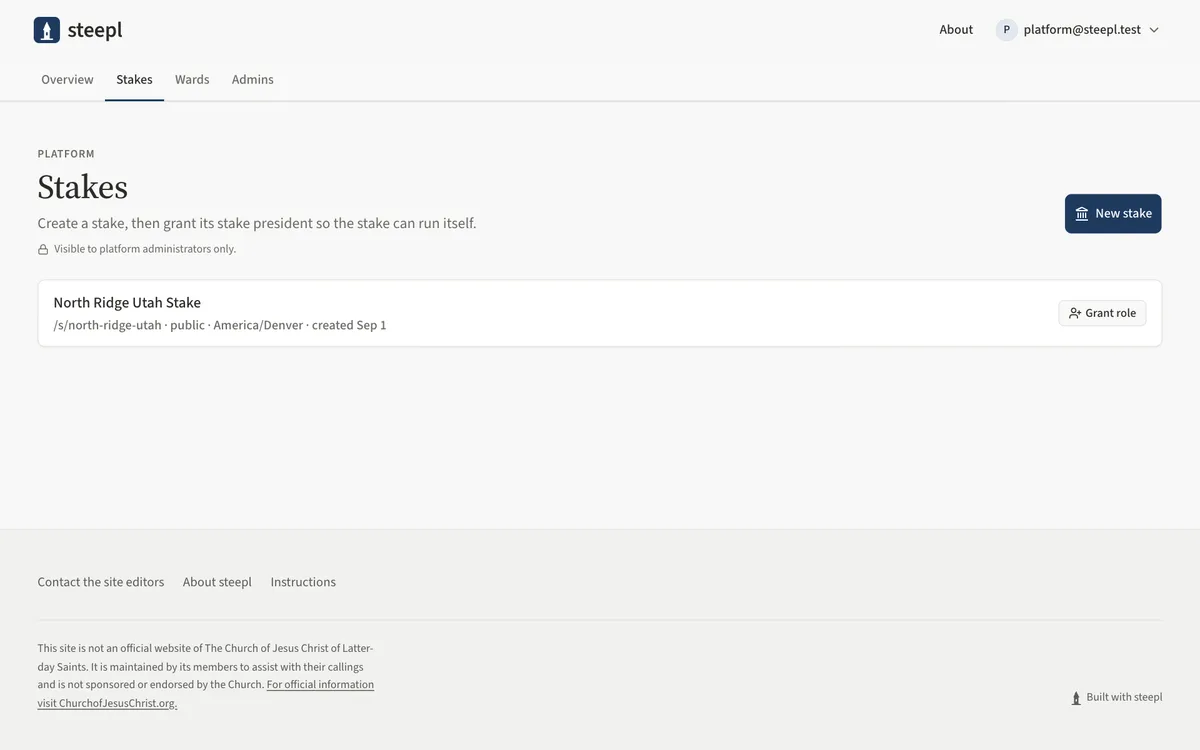
- Open Stakes and choose New stake.
- Enter the Name (never the Church's name), a Slug and the Timezone, then Create stake. It stays private until the stake president approves it.
- On the new stake's row, choose Grant role, pick Stake president, enter Name and Email, and choose Grant.
- If they have no account yet, copy the invite link (valid 14 days) and send it. The stake's name opens its stake pages.
Task 3: Create a ward and make the first grant
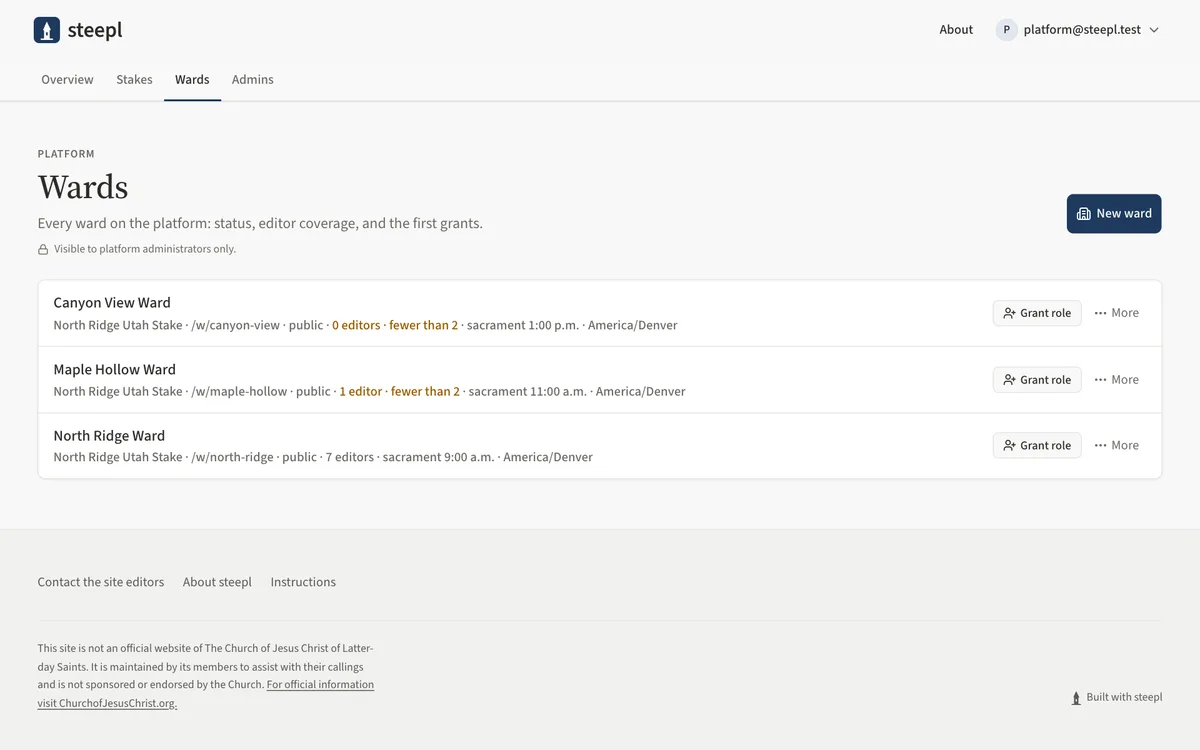
- Open Wards and choose New ward.
- Pick the Stake, enter Name, Slug, Unit (Ward or Branch), Sacrament meeting time and Timezone, then Create ward.
- Choose Grant role on its row, keep Bishop, enter his Name and Email, and choose Grant.
- The ward shows Awaiting bishop approval until the bishop approves the site in the ward's Settings.
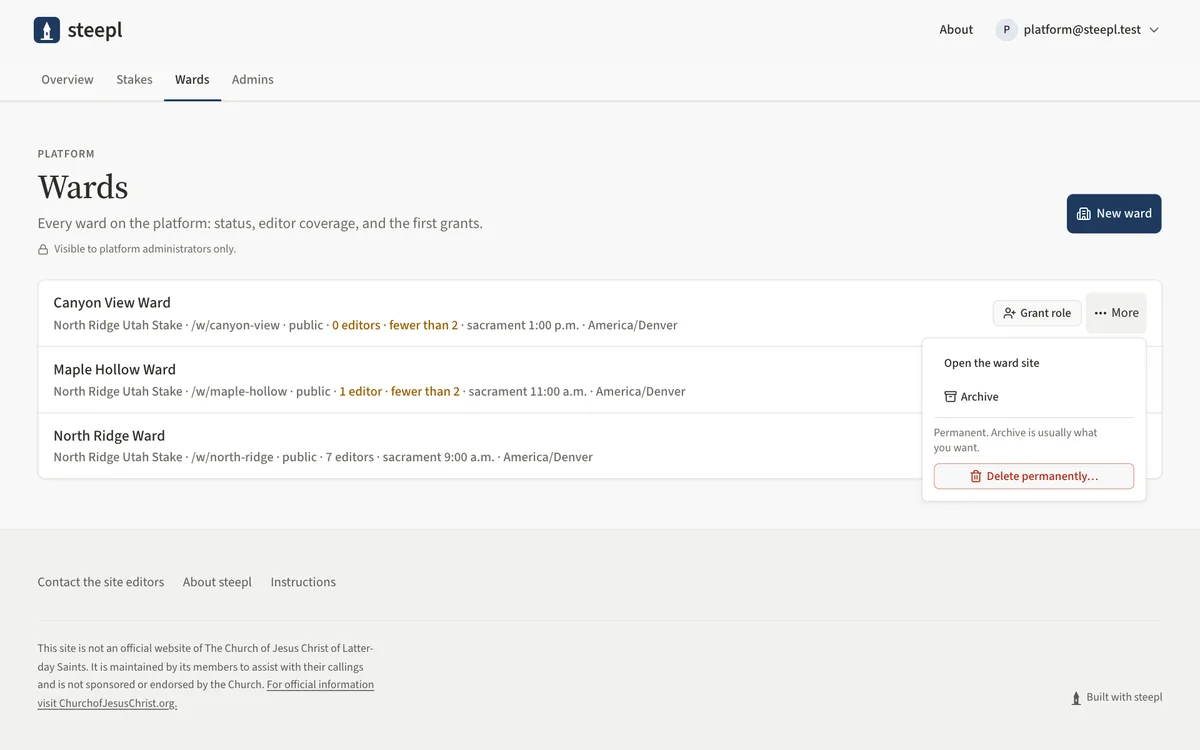
- The ward's name opens its admin; More on the row holds Open the ward site, Archive and Delete permanently….
Task 4: Archive or delete a ward
- On Wards, open More on the ward's row. Archive hides a ward from the public site and ward lookups; its content is kept and Unarchive (in the same menu) brings it back.
- To delete for good, choose Delete permanently… in that menu.
- First download the ward's content archive from its Settings page. Then type the ward's slug and choose Delete permanently.
UAT checklist
Tick each flow once you have confirmed it works as described. Note anything unexpected — a wrong label, a missing button, an error — under “What did you see?” and send it to your UAT coordinator.
What did you see?
Account used, date, device, and anything that did not match this guide.