Training guide · Ward leadership
Bishop
The bishop sees the whole ward site plus the confidential bishopric workspace: who needs attention, callings and releases, interviews, visits, meeting agendas and the conducting sheet. He approves the ward site, decides which modules the executive secretary and clerk may use, and can review every access in the audit log.
UAT test account: bishop@steepl.test — password from your UAT coordinator.
On this page
What you can do
- See On track: this Sunday's readiness, this week's interviews and visits, stale follow-ups and open assignments
- Keep a short, dated Needs attention list with an owner for every entry
- Move callings and releases from discussing to set apart, put them on Sunday's program, and clear them once recorded in LCR
- Schedule interviews (including tithing declaration), plan visits, and run meetings from Handbook agendas
- Conduct sacrament meeting from the Conducting sheet on your phone
- Grant modules to the executive secretary and ward clerk (only the bishop can) and review the Audit log
- Record the bishop's approval of the ward site and share the ward's join code
Before you start
- In your ward, choose Sign in with Google and use the Google account the stake or a platform administrator granted. UAT testers: on Sign in to steepl choose Sign in with email, enter the test account e-mail and the password from your UAT coordinator, then Sign in.
- After sign-in you land on the ward's This week. The ward menu now also shows Admin and Bishopric (with a lock).
- Open the confidential workspace from Bishopric in the ward menu (or the Confidential group in the admin sidebar). The tabs are Overview · Needs attention · Callings · Interviews · Visits · Meetings · Conducting sheet · Access & audit — you see only the ones your calling or grant covers. The tabs carry no lock icons; one lock sits in the Bishopric kicker above each page title.
- A muted line at the bottom of every page in the workspace repeats the Handbook reminder (GH 38.8.32) and who can open the area.
- General Handbook 38.8.32: confidential Church information — membership status, temporal needs, other non-public personal information — is not stored outside Church-provided systems. Keep notes here to a few words, never record worthiness, tithing or welfare details, and record official information in LCR.
- The Saturday afternoon digest e-mail (counts only, never names) is on by default. Turn it off or on under My account → Bishopric digest.
Task 1: Start from “On track”
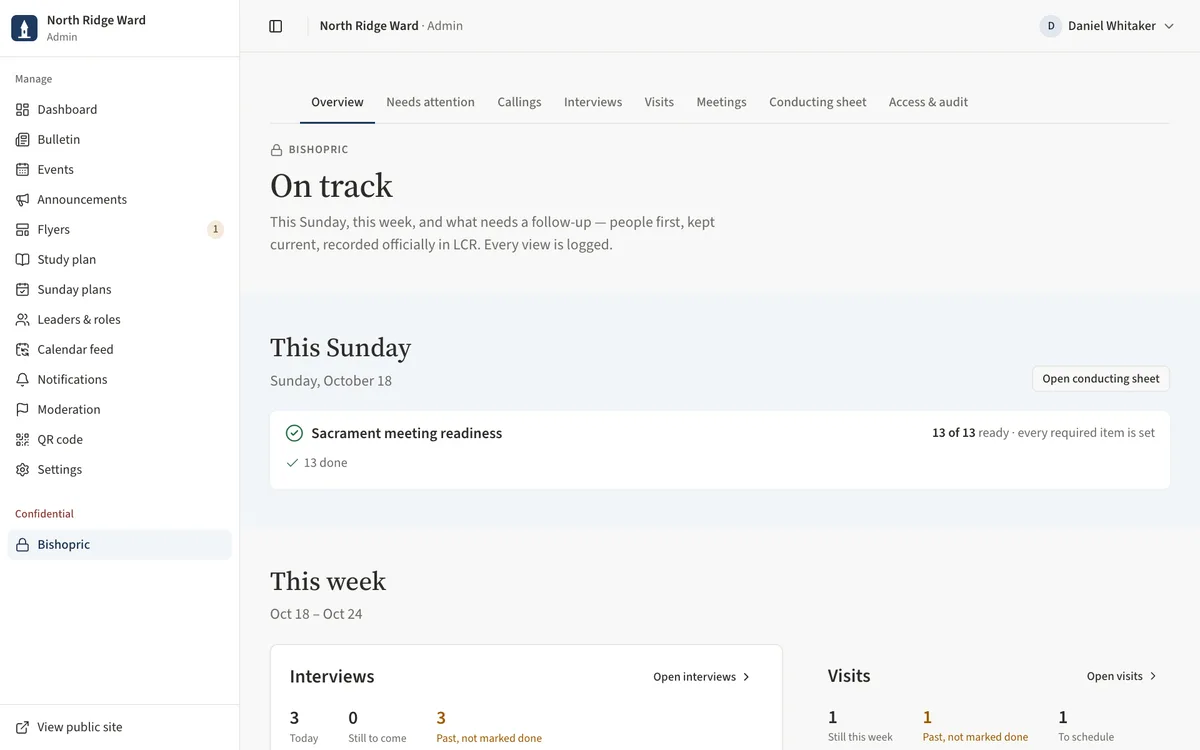
The overview gathers what needs you this Sunday and this week.
- Open Bishopric. The page title is On track, with the lock and Bishopric above it.
- The navy This Sunday band shows Sacrament meeting readiness; choose Open conducting sheet to see the details.
- This week puts Interviews and Visits side by side, each with a row of counts. Anything Past, not marked done is counted in amber.
- Below, Needs attention, Callings & releases and Meetings show stale entries, overdue steps and past-due assignments, each with a link to the full list.
- Season shows tithing declaration progress; Coming up (60 days) lists Sunday plans and yearly events that still need an owner.
Task 2: Keep the Needs attention list current
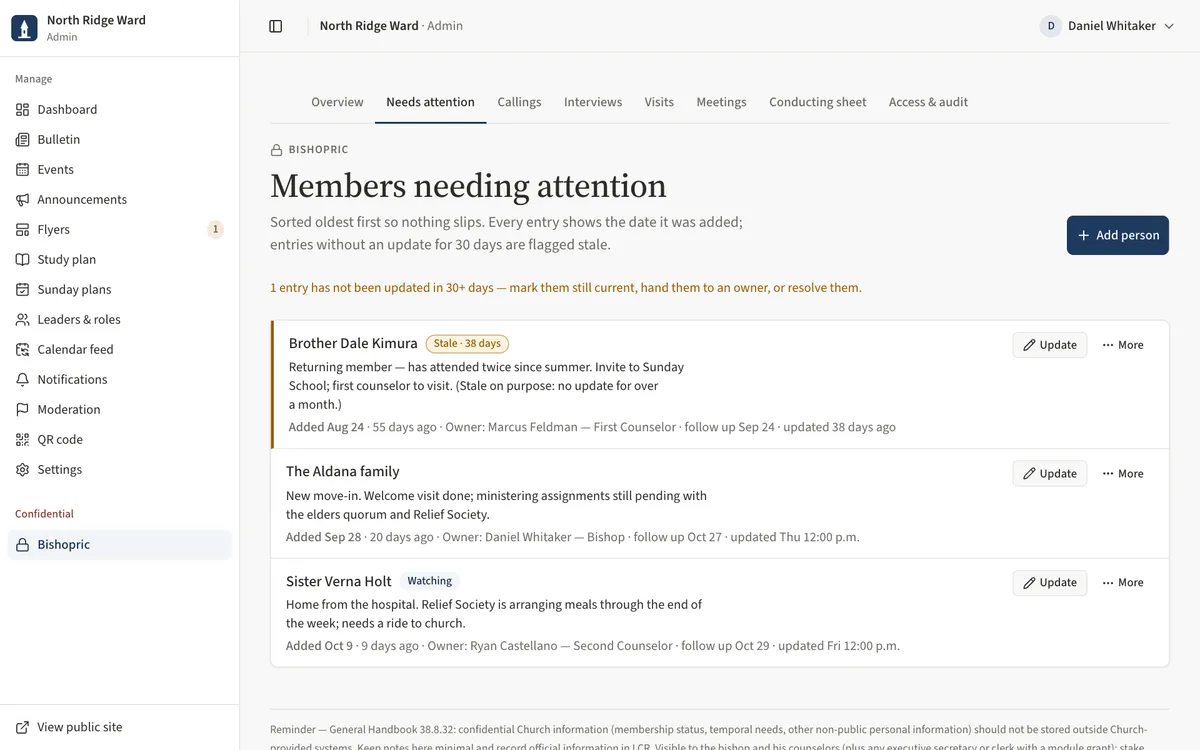
- Open Needs attention and choose Add person.
- Enter the Person or household (confidential) and a few words under Situation (confidential) — for example “New baby — meals this week”.
- Pick an Owner (a bishopric member, or the Relief Society or Elders Quorum president) and a Follow up on date, then Add — dated today.
- To keep an entry current, use Update, or open More on the row and choose Still current, Keep watching, Plan a visit or Resolve (Remove is there too, for mistakes).
- Entries with no update for 30 days are marked Stale and listed first — update, hand to an owner, or resolve them.
Task 3: Move a calling from discussing to set apart
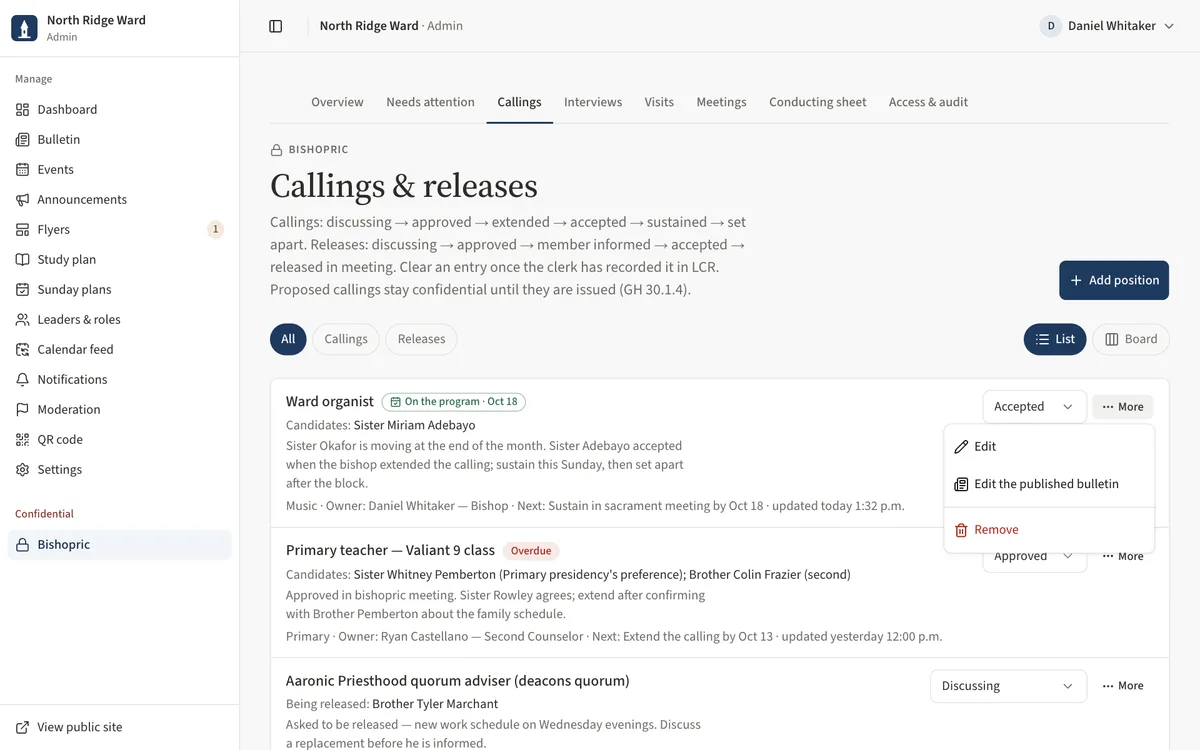
Callings go discussing → approved → extended → accepted → sustained → set apart; releases go discussing → approved → member informed → accepted → released in meeting.
- Open Callings and choose Add position. Choose Calling or Release, enter the Position, Organization, Candidates (confidential), an Owner and the Next step with a By date, then Add to pipeline.
- Change the stage with the status list on the row; it saves straight away. Use List or Board to switch views.
- Everything else for a row is in its More menu: Edit, Add to Sunday business, Set apart, Recorded in LCR and Remove (only the steps that fit the stage are listed).
- Once accepted, open More and choose Add to Sunday business. Pick the Sunday, check the Name as it will be read, tick the confirmation box and choose Add to program.
- After the sustaining, open More, choose Set apart, enter the Date and Mark set apart.
- When the clerk has recorded it, open More and choose Recorded in LCR. The entry moves to Cleared — recorded in LCR.
Task 4: Schedule interviews
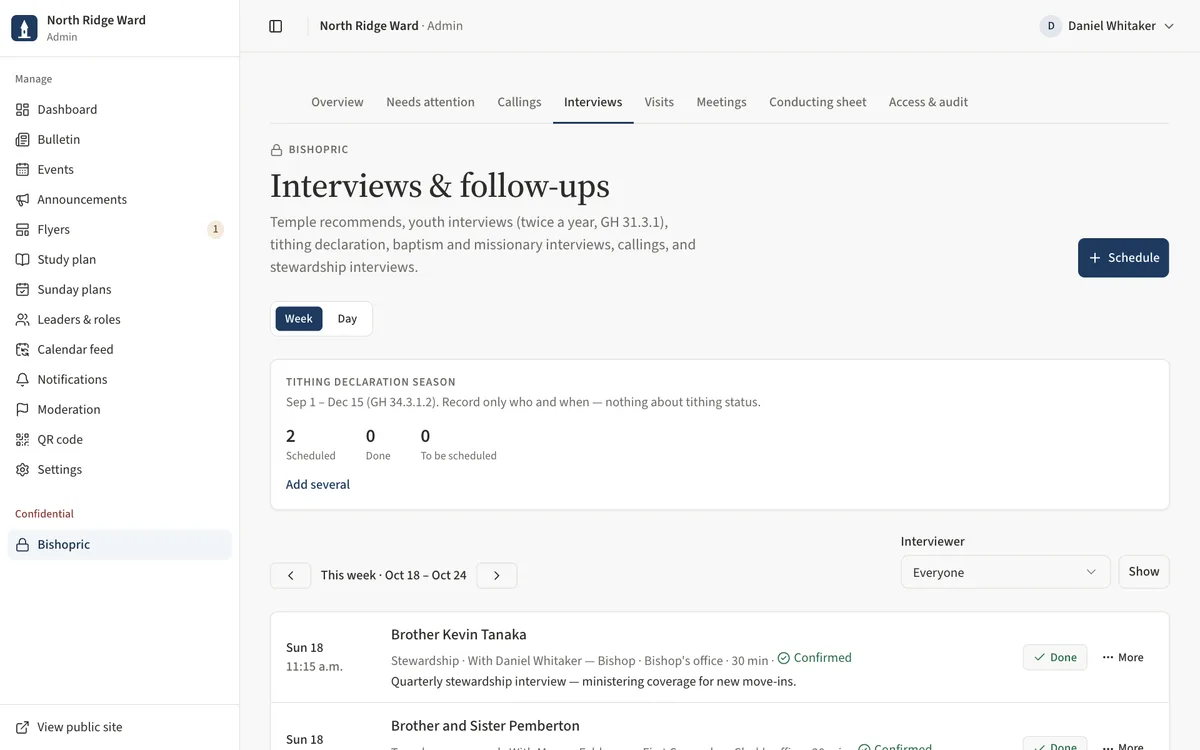
- Open Interviews and choose Schedule. Enter the Person (confidential), the Kind, When, Length and With, then Schedule. Leave When empty to add it to To be scheduled.
- Switch between Week and Day. The day view shows one column per interviewer; Overlaps another interview warns of a clash.
- In tithing season, the Tithing declaration season panel shows progress. Open Add several to add a list of families at once.
- After an interview, choose Done on the row, add an optional Outcome note and Schedule a follow-up (optional), then Mark done. Edit and Remove are in the row's More menu.
- Choose Print sheet on the day view for a one-page schedule (notes are never printed).
Task 5: Plan and record visits
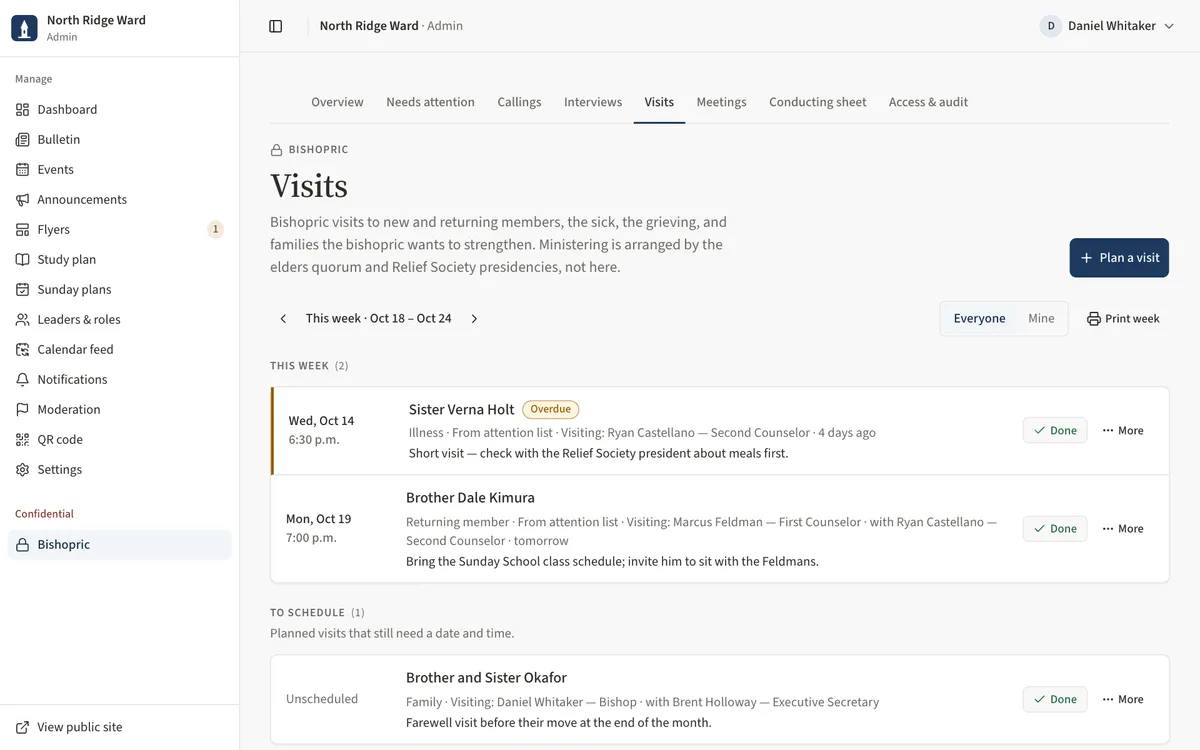
- Open Visits and choose Plan a visit. Enter the Person or household (confidential), Kind, When and Who visits, then Plan visit.
- Link it to an entry under From the attention list (optional) so a follow-up date carries over.
- Use Everyone or Mine and the week arrows; sections are This week, Coming up and To schedule. Missed visits show Overdue.
- After the visit, choose Done, add an Outcome (confidential) if needed, and Mark done. Edit, Cancel visit and Remove are in the row's More menu.
- Choose Print week for a printable list.
Task 6: Run a meeting from a Handbook agenda
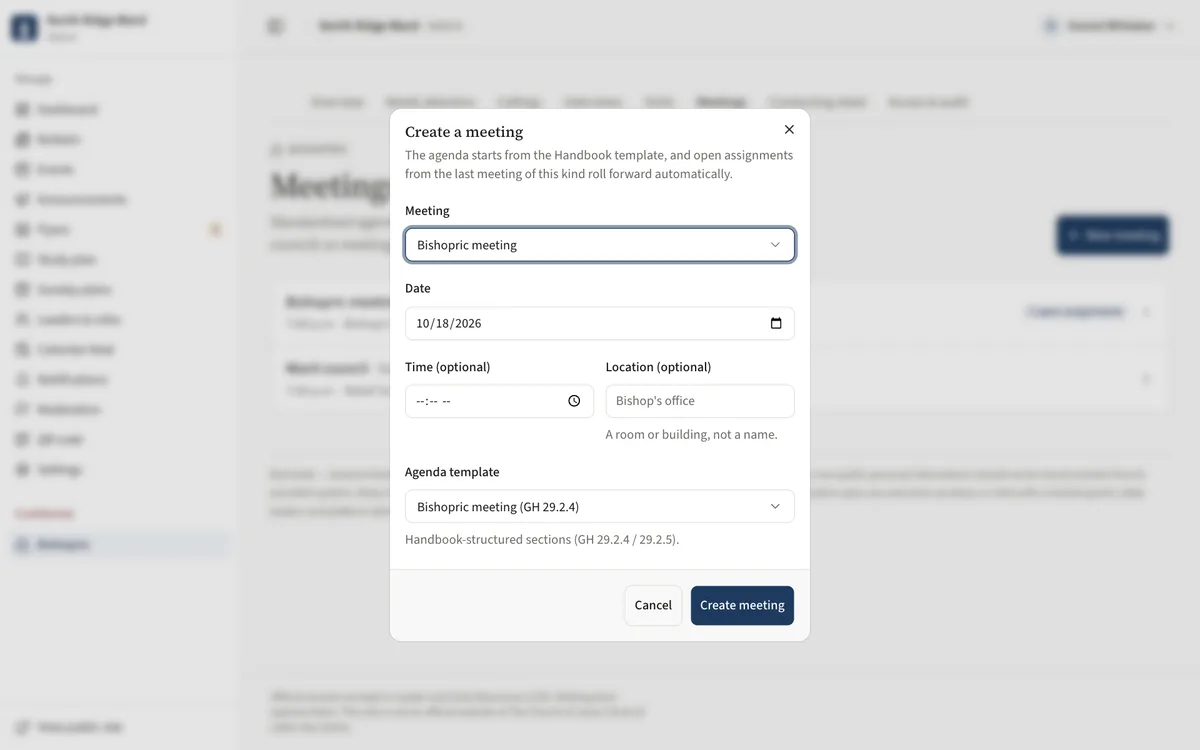
- Open Meetings and choose New meeting. Pick the Meeting (for example Bishopric meeting), the Date and an Agenda template, then Create meeting.
- Open assignments from the last meeting of that kind roll forward automatically.
- In Agenda, tick items as they are covered and use Add item or Add section.
- Under Assignments, choose Add assignment, enter the assignment, owner and due date, and Add.
- Open Reference (not part of the agenda) to glance at attention, callings, interviews and visits. Choose Add minutes for encrypted minutes, and Print agenda to print.
Task 7: Conduct sacrament meeting from your phone
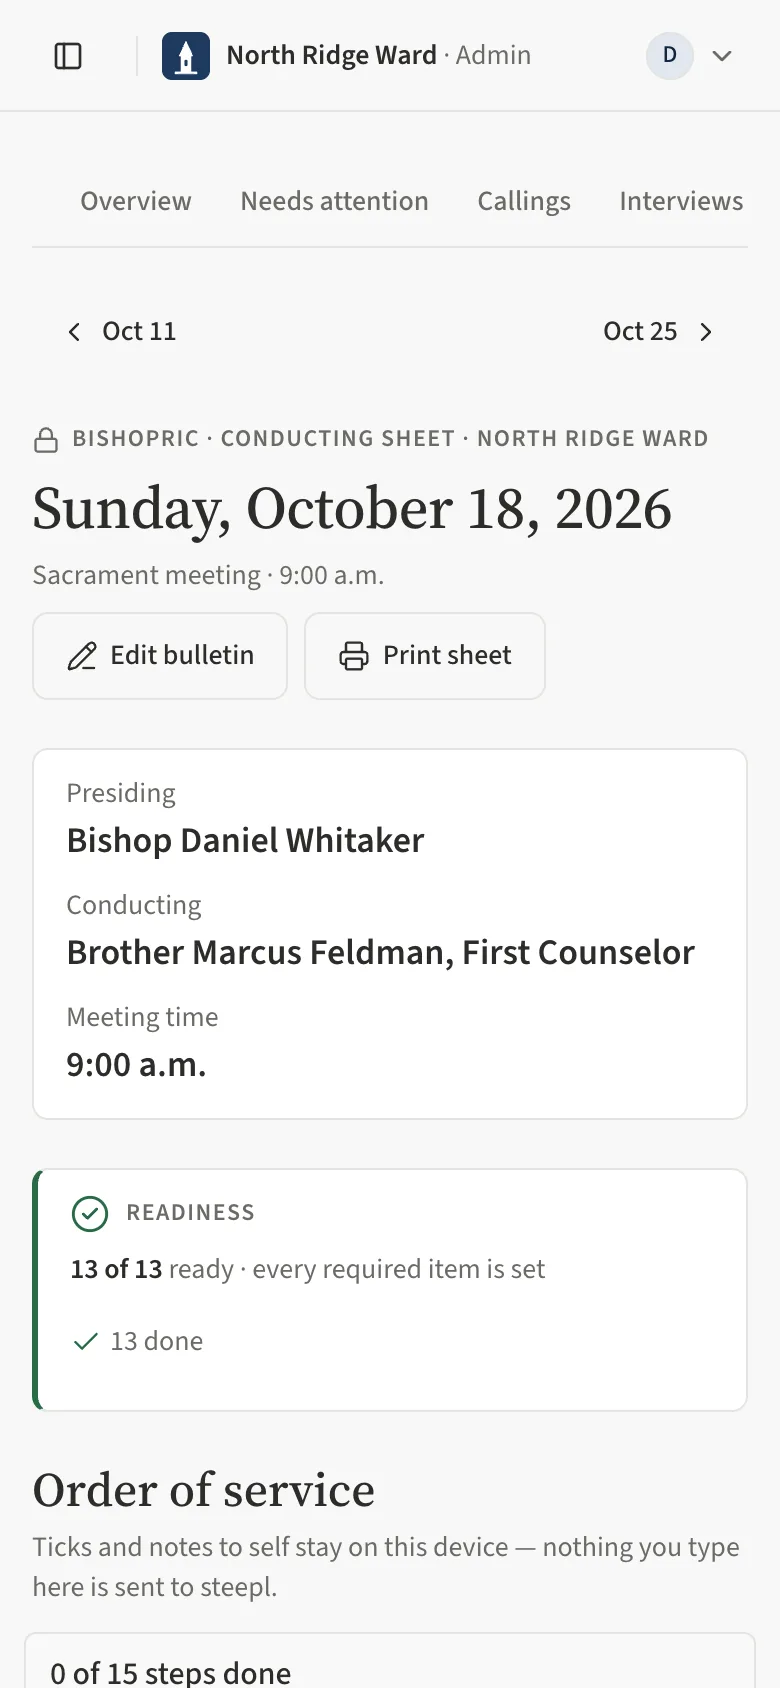
- Open Conducting sheet. It opens on this Sunday; use the arrows for another week.
- Check Readiness at the top. Missing required items link straight to the bulletin field, and Edit bulletin opens the editor.
- Follow the Order of service — one list, each step marked with a coloured edge. Tick each step as you go; it collapses to its title — choose Show to look again.
- Ward business lists the names to read. Members' programs show only a bare Ward business line, so the names are here and nowhere else.
- At the sacrament, use the Bread and Water tiles (see the next task).
- Choose Print sheet for a paper copy. Ticks and notes to self stay on your device only.
Task 8: Follow the sacrament prayers
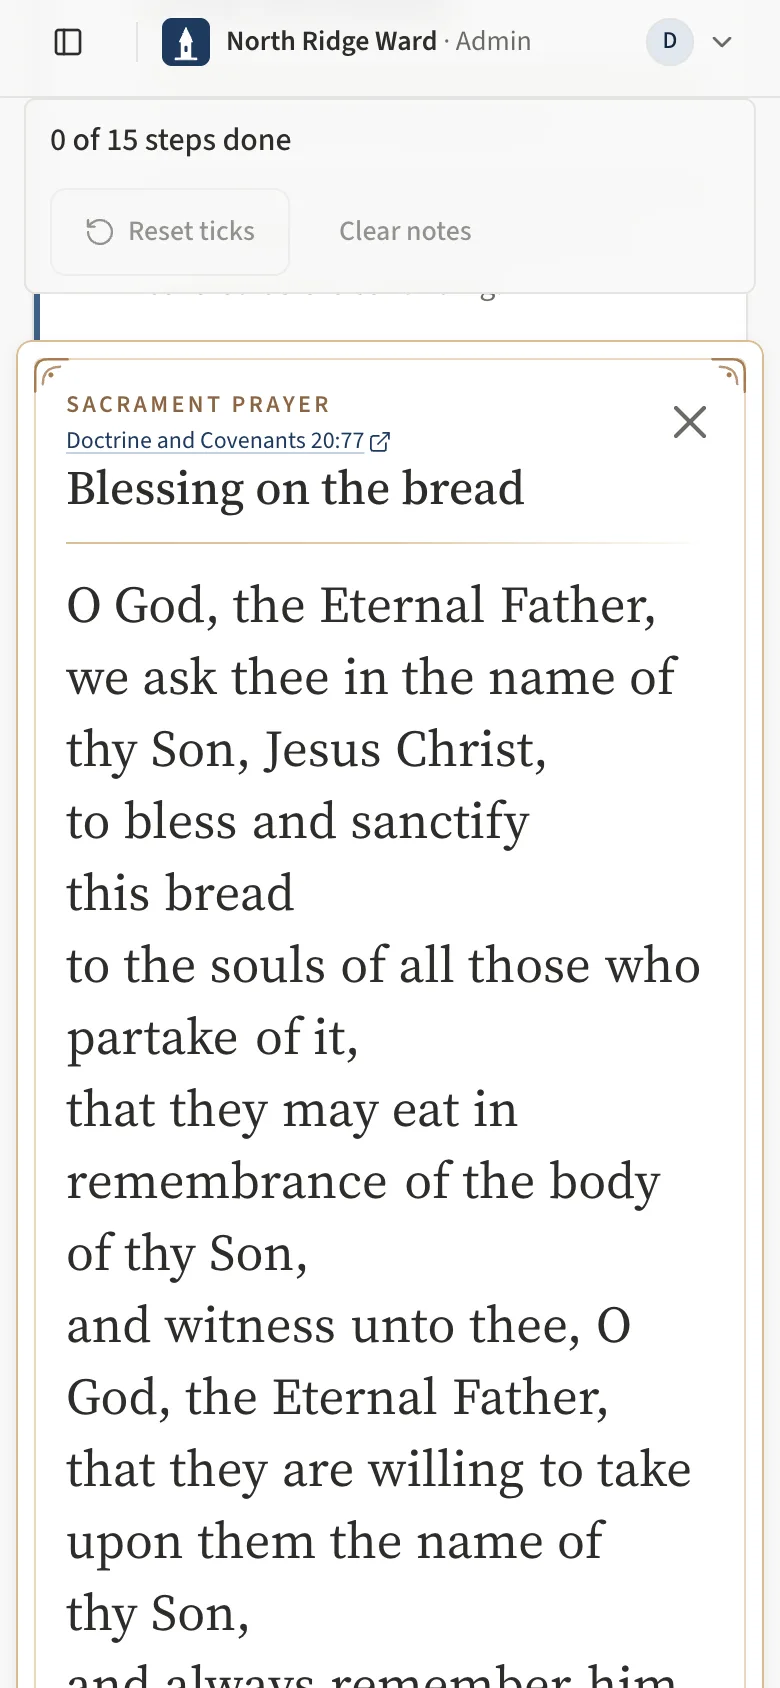
The sacrament step on the conducting sheet carries the two prayers, so you can follow the words as they are read.
- On the conducting sheet, find Administration of the sacrament. It shows two square tiles, Bread and Water.
- Tap Bread or Water. The box flips over into a prayer card with the prayer in large type, one phrase per line.
- If the browser asks to use the microphone, allow it. The chip reads Listening… and each word lights up as the priest reads it.
- Tap the card or the X to flip back to the sheet. The microphone stops.
Task 9: Grant modules and review the audit log
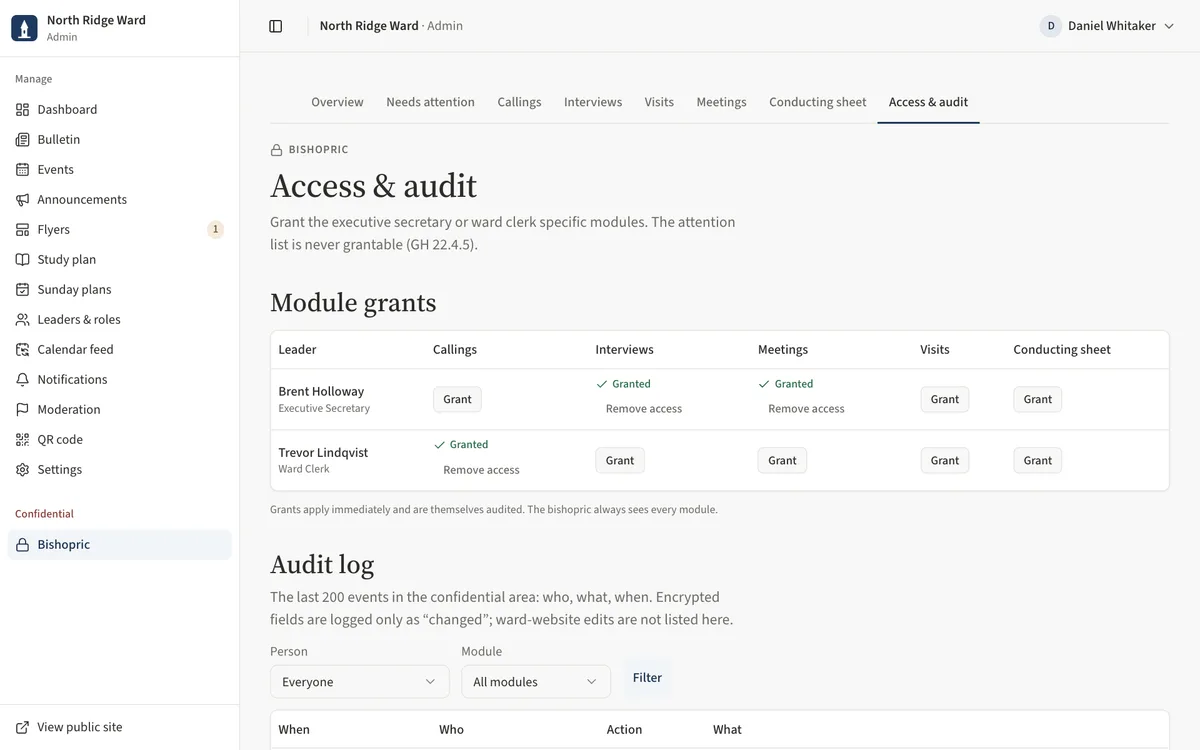
- Open Access & audit. Under Module grants, find the executive secretary or ward clerk.
- Choose Grant under the module they need — Callings, Interviews, Meetings, Visits or Conducting sheet. Choose Remove access to take it back.
- Under Audit log, filter by Person or Module and choose Filter to see who viewed or changed what, and when.
Task 10: Approve the site and share the join code
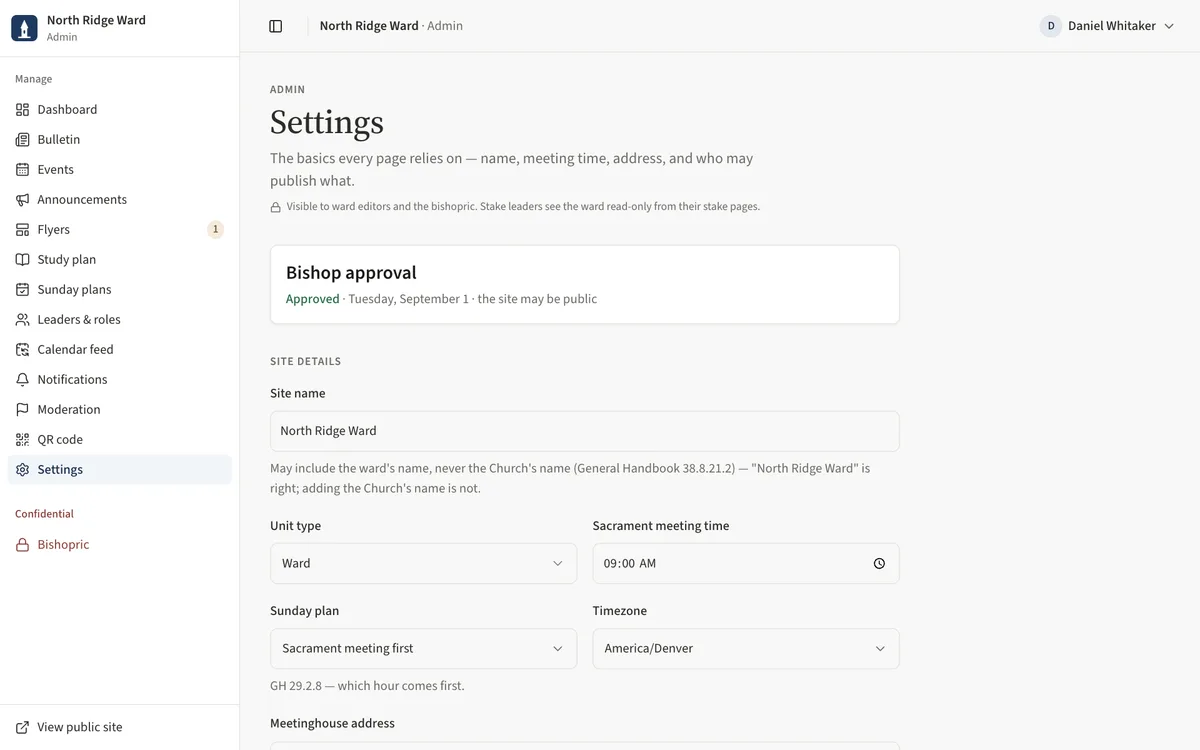
- Open Admin, then Settings.
- Under Bishop approval, tick As bishop, I approve this site for the ward and choose Record approval. Only then can the site be made public.
- Under Join code, choose Copy to share the code in person or in ward meetings. Rotate code makes a new one; the old code stops working.
UAT checklist
Tick each flow once you have confirmed it works as described. Note anything unexpected — a wrong label, a missing button, an error — under “What did you see?” and send it to your UAT coordinator.
What did you see?
Account used, date, device, and anything that did not match this guide.